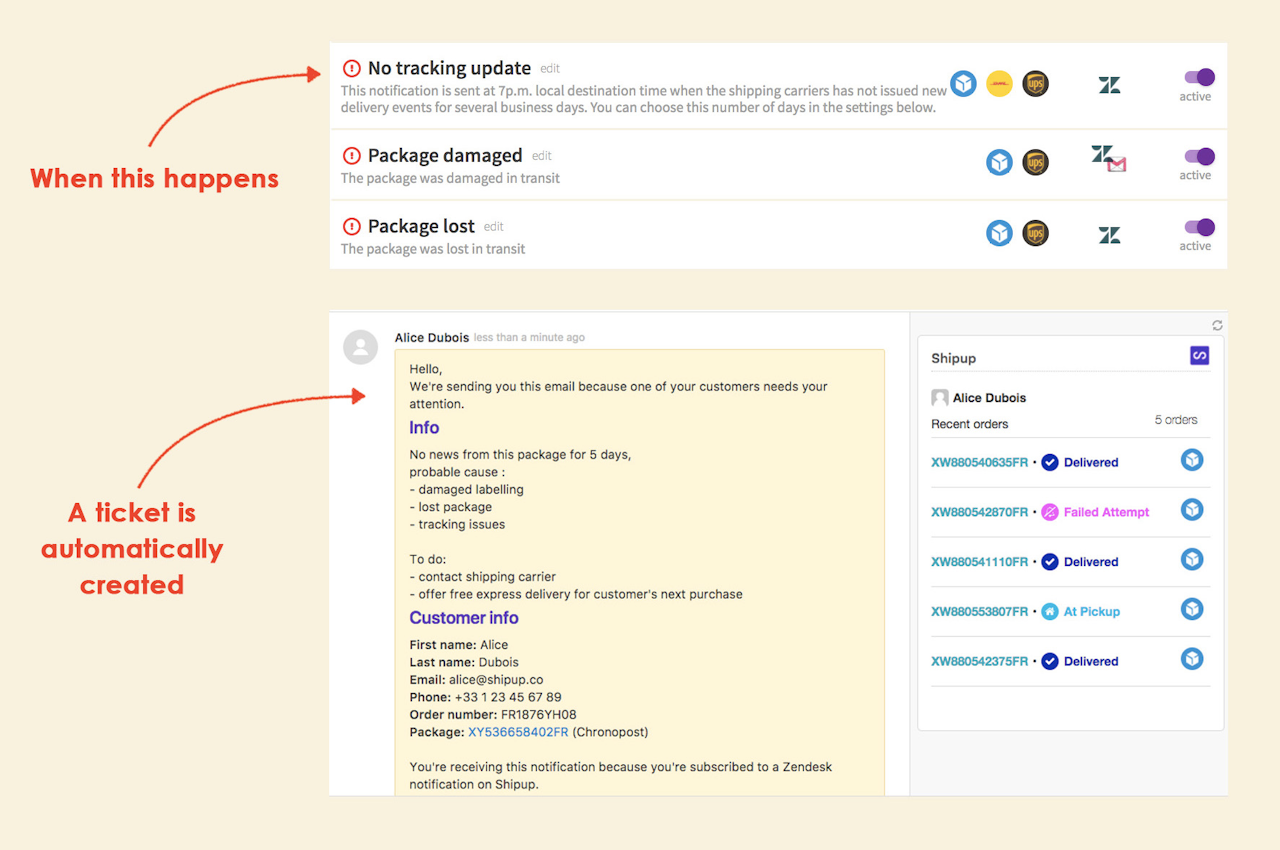

Generate alerts in Zendesk
Thanks to these alerts, your customer service department will be able to deal with problems proactively. Your proactivity will considerably reduce stress and dissatisfaction among your customers.
How do I create specific alerts for the notifications of my choice?
In your Shipup account, go to Notifications > Editor (or click here).
Click the notification you want to edit.
Click the "Edit" button next to "Channel", and from the popup, click the Zendesk icon.
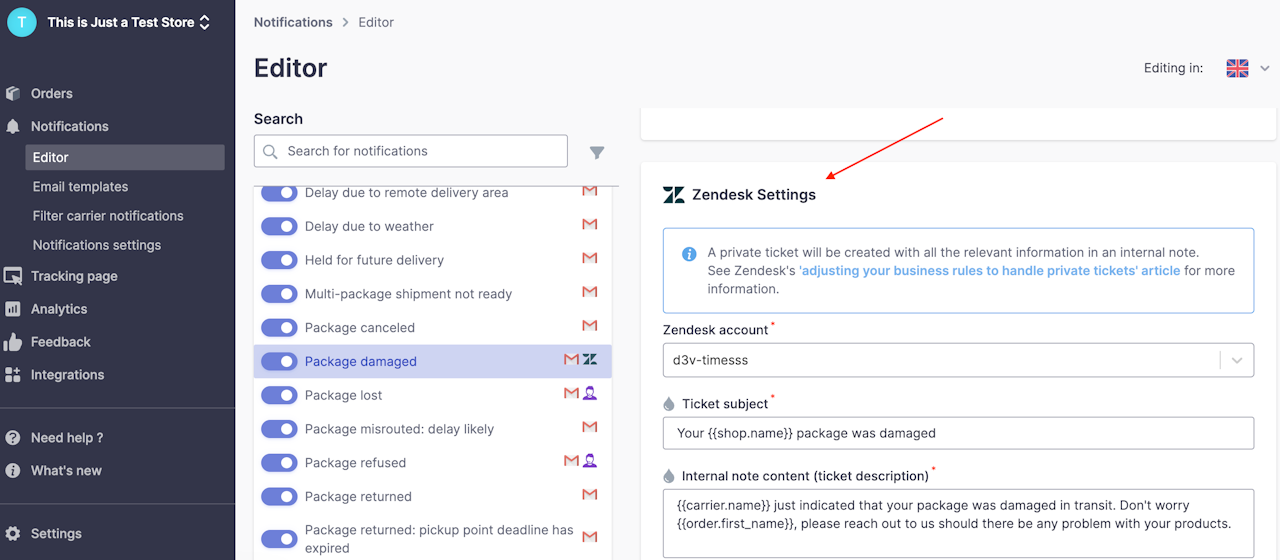
X out of the popup and scroll down to where it says "Zendesk Settings", and choose the Zendesk account from the dropdown menu.
Update the ticket subject, internal note content, and any relevant tags.
Choose the priority, assignee, group, and brand (if you have more than one account).
Click "Update".
Once you have selected the "Zendesk" channel, remember to:
do this for all notifications for which you want to generate an alert in Zendesk
do this in each language you use (not automatically applied in all languages)
Then, scroll down to Zendesk Settings to select the associated Zendesk account for each language and notification.

