

Click here or navigate to the Integrations tab of your Shipup account and click "Add an integration" and select the Customer.io app.
Fill in the fields required for connection
We will need the following information for the connection:
API key
Site ID
App Key
Then, on the Customer.io side, you'll need to create a campaign. Don't hesitate to check with your Customer.io contact if you have any problems.
Shipup side
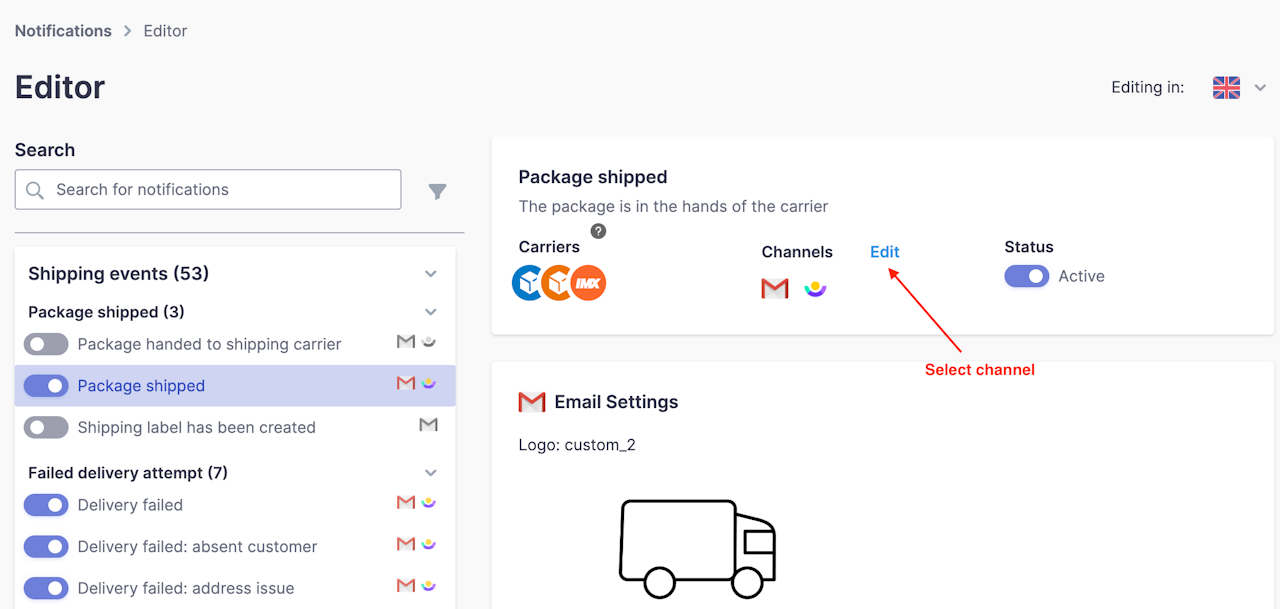
Once you've created your campaign, go to Notifications > Editor in Shipup.

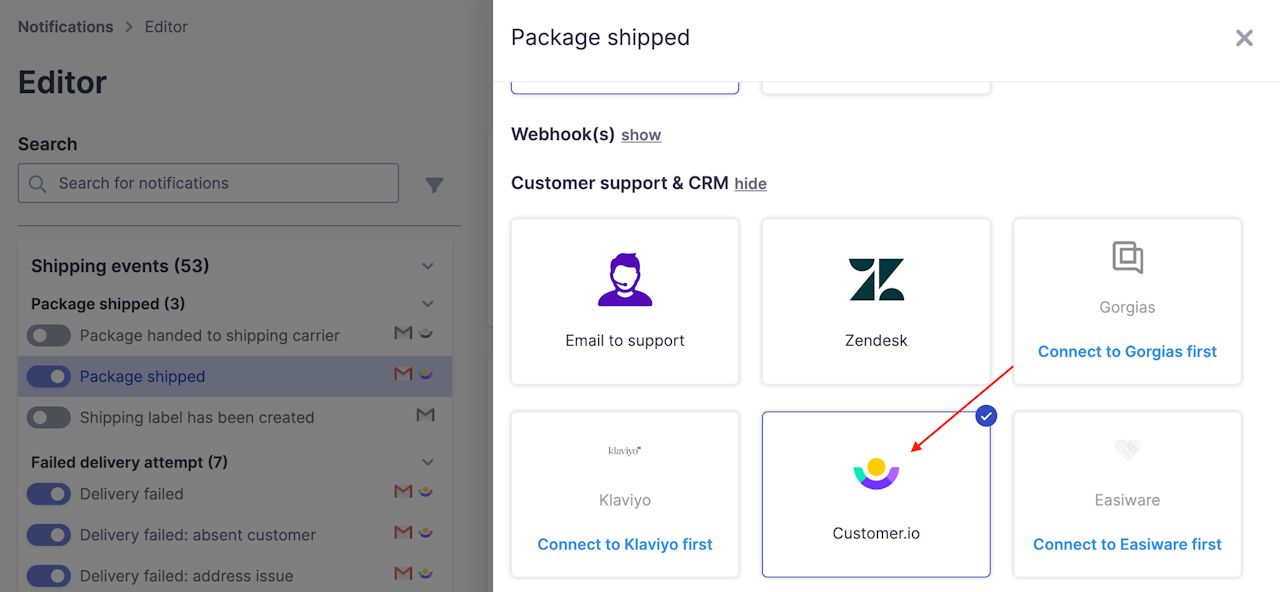
Activate Customer.io as a communication channel
To choose your channel, please look at the images on the left of the page. It's just a few clicks away!
Here are a few tips:

Email info:
E-mail client : {{ event.order.email }}
Type de notification : {{ event.subject }}
Email body:{{ event.title }}
{{ event.body }}
{{ event.subject }}
Tracking button:
{{event.notification.tracking_link}}
Order information:
Numéro de commande : {{ event.order.order_number }}
Numéro de suivi : {{ event.tracker.tracking_number }}
Transporteur : {{ event.tracker.carrier.name }}
Shipping info:
{{ event.shipping_address.display_address }}
Package contents:
Snippet to create a Liquid iteration (using "products" as an alias):
{% for products in event.line_items %}{% endfor %}
Variables that use the "products" alias
Product x quantity :{{ products.title }} x {{ products.quantity}}
Thumnails:{{ products.thumbnail.src }}
Thumbnail dimensions (can be used in image attributes):{{ products.thumbnail.width }}{{ products.thumbnail.height }}

